How to solder electronics components and ICs
How To Solder Electronics
Soldering Electronics Components and ICs

How to solder electronics
Learning how to solder is quite easy and, with a little practice, you will be soldering your own electronics circuits like a professional. This is a simple guide to soldering electronics yourself. Soldering is very rewarding and satisfying, even in today's disposable world. When you can make your own circuits, you can often save money making circuit boards yourself rather than buying expensive electronics. Or you can create something new that never existed before. Either way, soldering is fun and easy.
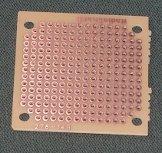
Get yourself some cheap bulk electronics packages. Look around online such as on ebay for some cheap electronics to practice on. You can also find pre-drilled circuit boards (below) with donut shaped copper pads on them. These are perfect for the beginner or for someone building a prototype circuit for testing.

A pre drilled perf board for soldering electronics components
You will also need a good soldering iron and a spool of solder. For average electronics soldering, a 30 to 45 watt soldering iron is the best. For beginners, a 45 watt iron is advised because it makes melting the solder much easier and faster.
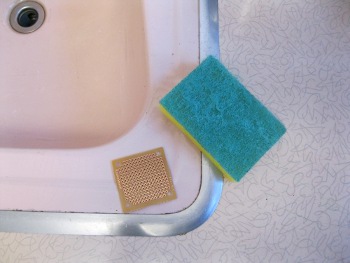
First, before you begin soldering, you will need to wash the circuit board. Circuit boards are coated with copper on one side to conduct electricity. Copper corrodes when exposed to the air for a long time, so to protect the copper traces and pads, they are normally coated to keep oxygen off the copper. Wash with a mild soap, warm water and a scratch pad, as seen in the photo below. Gently scrub until the surface of the copper is shiny all over. Do not rub too hard or you may damage the copper or rub right through.
Scrub the blank circuit board first to clean off any protective coating
The next steps cover inserting an electronic component into the circuit board to prepare it for soldering.
- To solder integrated circuits (ICs) simply slide the pins through the circuit board where you would like to solder it. Push the IC fully against the top of the board so the circuit sits squarely and evenly against the board. The pins should all be poking out through the bottom of the board (the side with the copper pads). Using a fingernail or fine tip screwdriver, bend the outside four legs of the IC over to hold it in place for soldering.
- To solder transistors, push the three pins through just about an eighth inch though the board and bend two of the legs over in opposite directions to hold it in place.
- To solder an electrolytic capacitor, simply push its legs through the board so it is flush with the circuit board and bend its legs over to hold it in place.
- To solder a ceramic capacitor, simply push it through the board until the capacitor is flush with the the top of the board and bend the legs.
- To solder a resistor, you can do it in two different ways. One way is to fold the resistor legs both downwards in a single direction and push the pins through the board. The other option is to keep one leg straight and bend the other leg fully down until it points in the same direction as the straight leg. Push the resistor legs through the board fully. In either case, bend the legs to hold the resistor in place for soldering.
There many other types of components you may encounter, but this should give you a general idea how to mount electronics components for soldering.
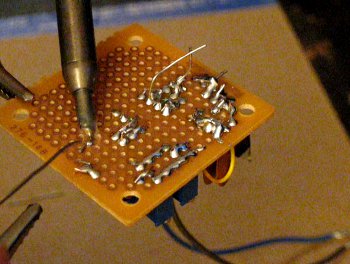
Now you can begin soldering. Make sure your soldering iron is hot enough to melt solder. Take your solder and touch it to the tip of the soldering iron. It should immediately liquify. If not, then you need to wait a bit longer for the iron to heat up.
When the solder melts easily on the tip of your iron, you can bring it close to the end of a component you want to solder. As you bring the soldering iron tip near to the pin you will solder, bring your solder close to it at the same time.
Touch the soldering iron tip to the pin you are soldering and the copper pad at the same moment. The soldering iron tip should heat up both the pin of the component and the copper donut at the same time so the solder will stick to it.
Immediately after the soldering iron touches the pin, touch the solder to the hot iron and the pin at the same time. When the solder flows liquid, move both the soldering iron and solder away from the circuit board and inspect your work.
Soldering electronics components
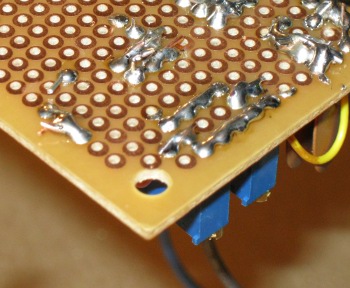
In the photo above you can see a closeup view of a few solder joints. Notice how each joint is rounded and even. You do not want globs of solder. Your solder joints should not be too thin or weak either. If you can still see a hole around the copper pad or you can see part of the pad, then you will need to hit it again with the iron and a bit of solder. The copper pad should be fully covered when properly soldered.
Make sure that the solder has not bridged a joint between two pins that are not supposed to be connected. If this happens, you will need to desolder the bridge. You can do this by heating up the solder bridge with the tip of your soldering iron and sucking it up with a vacuum pump (desoldering pump).
See How To Desolder
Again, looking at the photo above, you can see a row of pins that were soldered together in the front right edge of the board. Notice how the solder flows evenly between each pin. This is a good solder joint.
Some notes:
Integrated circuits and some other electronics components are very heat sensitive. Try not to hold the soldering iron to a pin for more than one or two seconds. If you need to re-solder a joint, pull the iron away from the circuit board and inspect your work for a second. Allow the electronics and circuit board to cool. Then try again. Try to be smooth and quick with the soldering iron.
With practice, you will be soldering like a pro.
You can see an instructional video here:
 How to solder electronics components - video for beginners
While you are over there please subscribe to my YouTube channel and follow our daily videos as we strive to become self sufficient and off the grid on a budget.
Feel free to ask any questions or get help with your project on our
About the Author
| Troy Reid |


